It’s been a while since my last post.
Been busy building up more DROs for friends to install and test.
This has evolved into a number of 1,2 and 3 axis designs with various sized displays.
More on this to come.
I’ve been distracted with the idea of making a digital height gauge using the same magnetic scales. Most of the basic electronics design is covered in my previous posts on DROs with a few exceptions.
The height gauge needed to be battery powered, auto power off and have a simple push on/push off function. I’ve decided on the LTC2954-1 pushbutton on/off controller made by Linear. This device has an enable and kill output. Perfect for this project.
The electronics is powered by a 6V lithium camera battery. A 3.3V LDO regulator is connected to the on/off controller and the Kill input connected to the ATMega328p to allow shutdown after a pre-determined time. Drawing about 6uA (according to datasheet) in power off mode, the LTC2954-1 seems like a good option for this application.


The ATMega328p is running at 8MHz loaded with the Arduino 8Mhz boot loader.
Schematic below:

As with the DROs described earlier, the magnetic sensor is made up of the AS6511 / LS7366 combination. the LS7366 being read by the ATMega328p on the SPI bus. Also attached to the SPI bus is a 0.91″ SSD1306 based 128×32 pixel OLED display. Current draw is about 30mA. This should give many hours use from the 6V camera battery.
Display zero reset and metric/imperial units switches are connected to the ATMega328p interupt lines with some hardware debouncing.
The code to run this is pretty straight forward but I’m sure someone can improve it. Values and settings could be stored on power off for example. I haven’t bothered with this. I’m using the U8glib display library rather than my OLED library used on the prototype DROs. Mainly because of the extra fonts and the U8glib library now supports more OLED types. I’ll most likely change the DRO code to use U8glib shortly becasue of this.
The ATMega328p sends a kill signal to the on/off controller after 5 minutes to conserve battery power.
Onto the mechcanical side.
I should say now that the accuracy of this unit will be limited by your machining skills and your machines’s ability to bore accurate parallel holes. I had more than one go at making the body and bronze bushes…. Movement in the gauge slides due to sloppy bush fit on the bars, will lead to disappointment….The sensor and electronics will be more accurate than your machining…
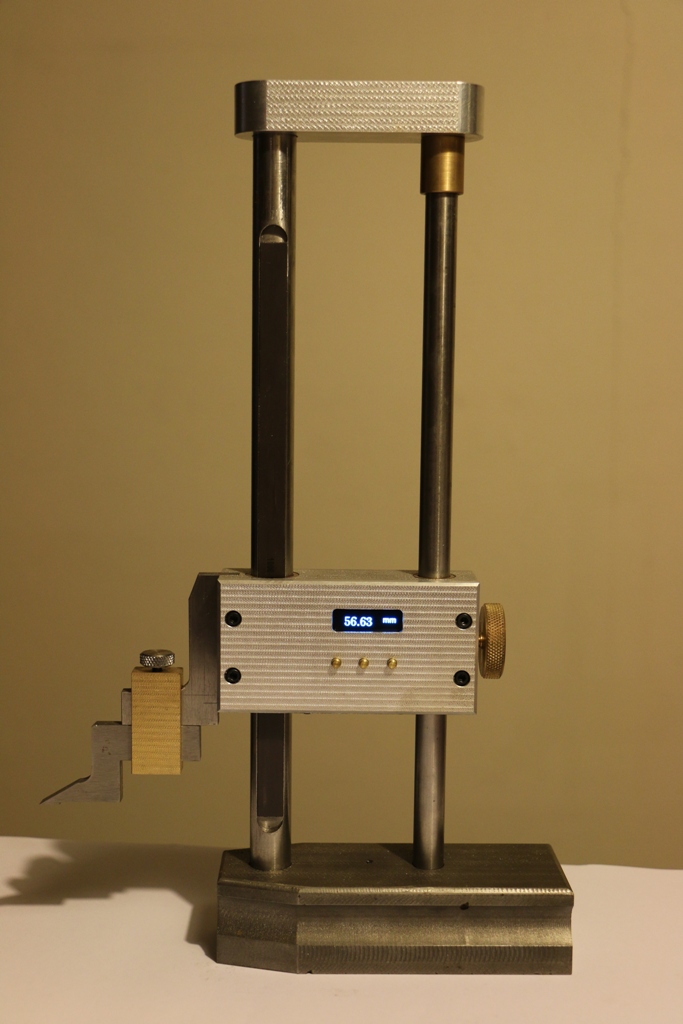
The main body of the gauge is made from a length of 2″ x 1″ (50mmx25mm) aluminium bar. Bronze bushes are installed into the block to run on 16mm and 12mm ground rods. In my case i used good quality silver steel (or drill rod as some of you call it) Again – the bronze bushes MUST be a good fit on these bars. I bored all holes on my milling machine with the stops set left and right. This allowed me to bore the base, body and top all parallel. Brass locking screw on the left of the gauge acts directly on the 12mm bar.
My base is made from a block of cast iron and the scribe made from a piece of 6mm gauge plate (or 01).
My gauge has a range of about 200mm but this can easily be changed by the length of your bars and length of magnetic strip.
The magnetic strip is set into the 16mm bar in a 10mm slot. From experience, I can say it is best to make the slot run to the end of the bar on at least one end. The AS5311 sensor sits less than 0.5mm above the magnetic strip. The sensor can easily be ripped of the circuit board at the end of the slot if you forget the slot doesn’t go to the end of the bar…ask me how i know this….

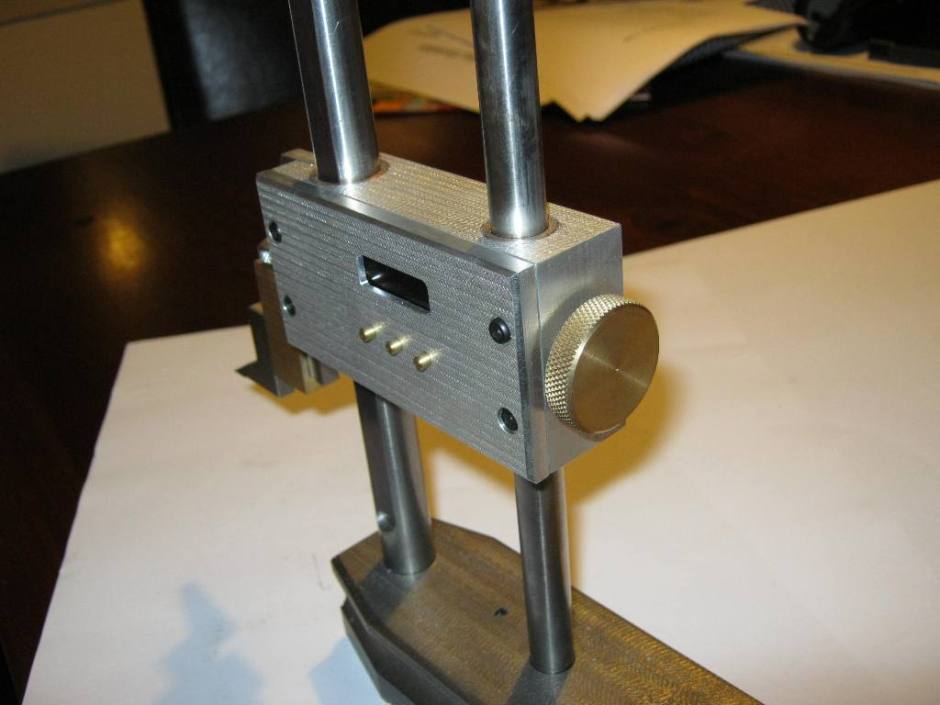
The PCB layout shown above allows the sensor portion on the left hand side to be ‘snapped’ off the board to allow mounting of the sensor. This can be seen below where the sensor is mount below the main PCB.

Shown above with the front panel removed. (It’s hard to photograph the OLED display to demonstrate how sharp and bright the display actually is.)
If you decide to make one of these – providing you take care machining, you should end up with a very usable, easy to read height gauge.
Eagle layout files and the code can be found here:- Design files
OLED displays can be purchased here: – buydisplay.com (for the blue display. Also available in white on black but I find the blue on black brighter)
These guys have a good selection of displays. This is where I purchase most of my displays.
